Game Flow
The game of Death Roads consists of a few consecutive rounds. Every round in the game follows this pattern, including the first and the last one (so there are no skipped phases).
Round Order
- Initiative Phase
- Preparation Phase
- Reveal Event Phase
- Race Phase
- Apply Status tokens
- Play Actions, Focus, Pass or Skid
- Dirt Lane Setback
- Resolved Event Phase
Initiative Phase
In this phase, Players rearrange the Vehicle order on the Initiative Track according to their current position on the board.
- Arrange the order in such a way that the Vehicle closer to the Far Ahead line is before the Vehicle more distant to the Far Ahead line on the Initiative Track.
- In case of a tie - the Vehicle with higher Gear is before the Vehicle with lower Gear.
- If there is still a tie - the Vehicle that is before on the Initiative Track stays before the Vehicle that is behind on the Initiative Track.
Initiative priority
- On-board position (closest to the Far Ahead line first)
- Gear (higher Gear first)
- Initiative Track position (remains the same)
Preparation Phase
Prepare for the round.
Preparation Order
- Set Handling to maximum value
- Draw Action cards
- Discard any number of Action cards in your hand
- Draw new Action cards from your Deck until you have 5 cards in your hand
Gain Handling
Handling shows how well you can control your Vehicle. It allows you to perform Actions, but be very careful - poor Handling means a dangerous Skid!
At this point, your Handling token should be aside the Handling track.
In this step, just put your Handling token back on the leftmost spot on the Handling Track on your Vehicle board.
Draw Actions Cards
You may discard any number of the action cards in your hand, then draw new action cards from your Deck until you have 5.
If you already have 5 or more action cards in your hand, you don't need to discard any of them, but you won't draw more action cards during this phase.
If you have to draw a card, but your Deck is empty - simply reshuffle your Discard and flip it face down, creating your new Deck.
Reveal Event Phase
In this phase, Players check what happens on the next stage of the road.
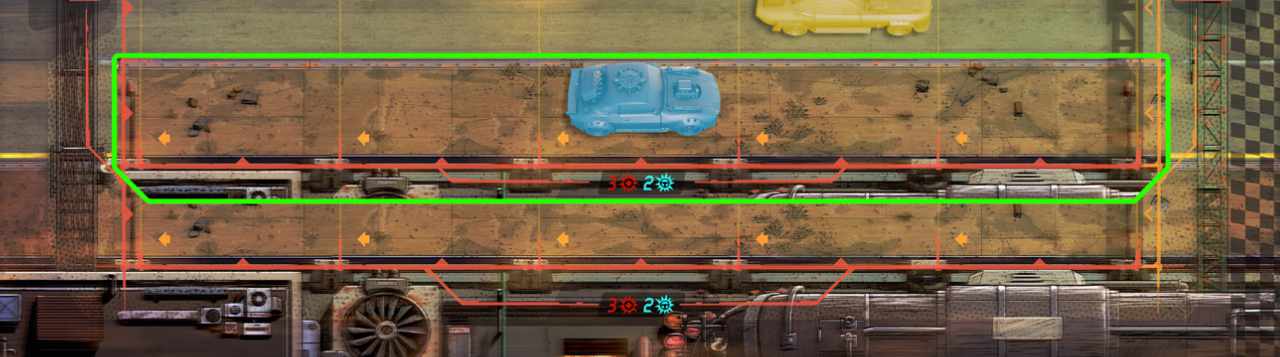
The Player with the Vehicle on the first spot on the Initiative Track flips the leftmost Road Event card on the Event Track face up so everyone can read it. That Player draws a Lane card if indicated on the flipped Road Event by and places the Road Event Token near the affected Lane next to its Far Ahead Line. The leftmost Asphalt Lane is always considered to be Lane ”1” and every subsequent Asphalt Lane is designated as "2", "3" etc (ignore Dirt Lanes). Put the Road Event Token on that Lane with the event color side up (red or green). Reshuffle Lane cards. If there is no Lane with the drawn number, remove that Lane card from the game and draw again.
If there are no more Road Event cards left and the last revealed card has this icon - simply discard it and draw a new one to replace it!
If there is a Final Stretch card above the current Road Event card - flip it face up as well.
Note: In general, you should avoid the lanes with the Road Event token with its red back- ground showing, but the green background side up suggests something positive. Some events affect the whole board.
When you have to put a Lane Overlay on the board, place it so it reduces the number of playable la- -nes by 1. When you are asked to place or move a Lane Overlay that is already on the board, simply slide it one lane closer to the opposite side of the board. Once pla- ced, Lane Overlay stays until the end of the game.
Race Phase
This is the main phase of the game. In the Race Phase, Players take actions and perform Skids.
During the Race Phase, Players take alternating turns until there is no Player with their Handling token on the Handling track. The first turn is for the Player who has their token on the first spot of the Initiative Track. Then, the Player with their token on the second spot of the Initiative Track performs their turn and so on. When there are no Players with their Handling token on their Handling track - proceed to the Resolve Event Phase.
Note: If you still have your Handling token on your Handling track - you still have to take a turn (and possibly pass), even if there are Players already out of action. This means you would not necessarily play the same number of turns in a round as other Players.
Race Phase Order
IMAGE TO COMEPlayer Turn
Players may use cards on their hand only during their own turn so this is the most vital part of the game.
To perform your turn, follow these steps:
Player Turn Order
- Apply Status tokens
- Skid, Pass, Focus or Play Actions
- Dirt Lane Setback
Apply Status Tokens
Status tokens show what happens with your Vehicle. Usually, you want to avoid them, but some powerful actions can force you to take them. If you have any Status Tokens near your Vehicle board, you should resolve them one by one in any order.
Stun (Blue)
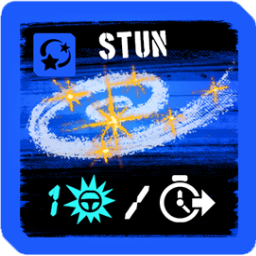
Lose 1 Handling or declare to play no Actions this turn, then discard this token. If you declared to play no Actions you still have to either Focus or Pass.
If you drop below 1 Handling as an effect of Stun, perform Skid after resolving all your remaining Status tokens.
If your Handling is below 1 before Apply Status tokens phase, discard all Stun tokens without resolving them.
Burn (Orange)
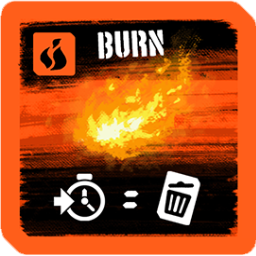
Discard an action card of your choice from your hand, then discard this token. It has no effect if you have no cards in your hand. This time, you were lucky!
Veer (Yellow)
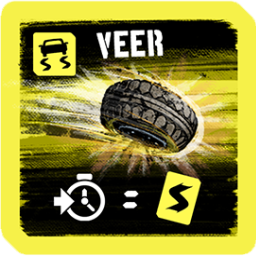
Shuffle all Skid cards into the Skid Deck. Draw and resolve 1 Skid card for every Veer token you have, then discard the tokens.
Skid, Pass, Focus or Play Actions
If your Handling token is to the right of the 1 on your Handling track at the end of Apply Status tokens step - you must perform a Skid in the next step.
If you have any positive Handling, you may either Pass, Focus or Play Actions.
Skid
Performing a Skid is mandatory when your Handling is below 1. This means you cannot play Actions this round anymore.
To perform a Skid follow the steps below.
Skid Order
- Take the Status tokens corresponding to the icons under and to the left of your Handling token.
- Remove your Handling token from your Handling track and put it aside.
- Put your Initiative token slightly off its spot, to mark you ended this round.
- Check your current Gear - the higher the Gear the more dangerous the Skid is.
- Shuffle all Skid cards into the Skid Deck.
- Draw Skid cards - draw the number equal to your Gear level and place them face down in a row.
- Flip the leftmost face-down Skid card face up.
- Resolve the flipped Skid card.
- If there is any face-down Skid card in the row and you have not triggered Far Behind - go to step 7 and continue.
After a Skid, you can no longer take turns during the current round. Don't worry, you will regain your maximum Handling at the beginning of the next round. If you suffer any Handling loss this round after a Skid - simply ignore it!
Pass
Remove your Handling token from your Handling track and put it aside. Put your Initiative token slightly off its spot to mark you ended this round. From now until the end of the round, you cannot take any actions (including Skid), but you cannot suffer any Handling loss either.
This is the only action you can take if you still have Handling but have no more cards in your hand.
Focus
Discard one card from your hand and simply do nothing. Sometimes, it might be worth waiting for your opponents to act first. Remember, you can avoid the effects of the STUN Status by Focusing.
Play Actions
Now is your turn to act! In this phase, Players use cards in their hand to drive and shoot opponents. During your turn, you can play only one Card Action from your hand, use one Driver Action or do both in any order.
If you drop below 1 Handling after you have played your first Action, you cannot play any more Actions. You will have to resolve your Skid next turn.
Discard: When you have to discard a card - just put it into your Discard.
Discard: The pile of your used action cards is called the Discard. Keep it face up near your Deck. At the beginning of the game your Discard should be empty.
Draw: Each time you have to draw a card, you draw it from your Deck. If you have to draw a card, but your Deck is empty - simply reshuffle your Discard and flip it face down, creating your new Deck.
Hand: During a game keep all action cards you draw from your Deck hidden to the opponents. Although you are not obligated to literally keep your cards in your hands - for the sake of convenience we refer to your cards pool as your hand. You can always check your hand, but you are not allowed to see your opponents' hands.
Each action card has its Handling cost in the upper left corner. You cannot play any more Actions when your Handling is less than 1 (you have your Handling token on a spot with an icon instead of a number).
You can always play any Actions you want if you have at least 1 Handling - even if the Action cost exceeds your current Handling. To play a card follow these steps:
Playing an Action card
- Put the action card face up near your Vehicle board so every Player can get familiarized with its effect.
- Pay the Action Handling cost - which means you have to move your Handling token the number of spots to the right equal to the Action Handling cost. If there are no more spots - simply ignore the exceeding movement of your Handling token.
- Resolve every effect on the action card assigned to your current Gear. Top to bottom, left to right. You cannot ignore any of the effects listed.
- Discard that action card.
There are a few types of action cards you can choose from.
Vehicle Cards
There are yellow and blue (illustration background) Vehicle cards. Both are assigned to your Vehicle, and every Vehicle's set is slightly different. Mechanically, they are the same, as the background color only suggests what to expect from the cards (yellow tend to have more movement up and down while blue cards tend to have more left and right).
Weapon Cards
Weapon cards are red. You compile your set of Weapon cards at the beginning of a game.
- Cost
- Name
- Image
- Weapon Pair Code
- Range/Area of effect
- Target Effect box
- (optional) If Hit Box
Weapon Pair Code
The Letter represents which Deck the card comes from (”F” is for ”Front Weapons”, ”M” is for ”Middle Weapons” and ”B” is for ”Back Weapons”).
The numbers represent which pair the card belongs to as each number is printed on exactly two cards that go together.
Notice the red frame at the bottom of the card - this is the effect you apply to the enemy Vehicle immediately on hit. Perform If Hit Box effect on your vehicle and only when you hit someone.
Weapon Card in its main part contains a representation of the effective range of the weapon it represents. The following symbols are used:
| Represents your Vehicle and is your reference point. | |
| Represents the maximal range of the attack. The number of such red and white target symbols indicates also how many simultaneous targets can be hit with the given Weapon card. | |
| Represents a default line of fire of the attack. If there is another Vehicle on a space corresponding to this symbol treat it like the maximal range symbol and ignore any symbols on spaces behind it (the Attack ends here). | |
| Represents an alternative maximal range of the attack. You can ignore one of the maximal range symbols on the Weapon card to treat this symbol as a new maximal range symbol. | |
| Represents an alternative line of fire of the attack. It gives you an option to shift the default line of fire and treat it as the default line of fire instead. |
Driver Actions
Although a Driver Action is not exactly a card, its effect is pretty similar to a Card Action. The main difference is in how you play such an Action.
Each Driver Action is available for its owner in every turn, but you can play only one Driver Action per turn. To play it, you have to discard a card from your hand (as indicated in its cost by the trash can icon) and pay the Handling cost.
Driver Passive Skill
As an additional bonus, each Driver has a unique skill that helps you in some aspects of the game.
Condition
Handling
Gears
Movement
Bash
Far Ahead
Far Behind
Barriers
Dirt Lane Setback
It is much harder to keep up driving on gravel.
If, after your turn your Vehicle is on a Dirt Lane, perform move back 1 action.
Note: It does not matter if you Skid, Pass, Focus or Play Actions. If you are on the Dirt Lane - you have to move back. But if you have already Passed or Skid this round, you skip this phase as well, thus not moving back.
Resolving Damage Chart
Resolve Event Phase
Resolve the Final Stretch card (if any), but do not discard it. The Final Stretch card stays for the rest of the game.
Resolve the current Road Event card, then discard it.
You are ready!
This concludes the explanation of the rules you need to know to be able to play.